Brown Sugar & Balsamic Glazed Pork Tenderloin

This is a recipe that I found via Pinterest (one of my many obsessions).  It looked so yummy that even though I am not much of a pork eater, I had to try it.  I am so glad I did!  It was fabulous!  I honestly don't think I've ever cooked anything pork, other than bacon.  And possibly a ham?!?  But even that, I'm not a hug fan of.  My husband makes the BEST Smoked Pork BBQ (NC Style of course) but that's the extent my culinary experiences with pork...until now.  This recipe just might make me a pork convert.  C + C Marriage Factory is the site that I found this recipe & consequently these pictures that summoned me to try it.  I've seen it all over the web, with lots of people using pork loin roasts too.  I have only tried it with a tenderloin so far though.  This is really so yummy & such an easy recipe, you've got to give it a try!
Ingredients:
1, 2 lb Pork Tenderloin
1 tsp Ground Sage
1/2 tsp Salt
1/4 tsp Pepper
1 clove Garlic, crushed
1/2 cup Water
 
For the Glaze:
1/2 cup Brown Sugar
1 tbsp Cornstarch
1/4 cup Balsamic Vinegar
1/2 cup Water
2 tbsp Soy Sauce
 
Directions:
Trim the silver skin & extra fat off the pork.  Combine sage, salt, pepper and garlic in a small bowl.  Then rub over the roast. Place it in slow cooker with 1/2 cup water. Cook on low for 6-8 hours. About 1 hour before roast is done, combine ingredients for the glaze in small sauce pan.  Cook over medium heat, stirring until mixture thickens. Brush roast with the glaze 2 or 3 times during the last hour of cooking. Serve with remaining glaze on the side.
**  Note:  Just before I brushed the roast with the glaze, I drained the excess liquid from the slow cooker.  If you don't have a lot of liquid, don't worry about doing that. 


Enjoy!!

Roasted Tomatoes with Bread Crumbs & Parmesan Cheese

 This is one of my personal favorites.  Especially later in the summer when there are tons & tons of ripe fresh tomatoes to use.  You can use large slicing tomatoes or Roma tomatoes, just pick up any ripe slicing tomato at the Farmers Market or grocery store that you like.  I found this recipe about a year ago and have made it over & over.  I even took pictures to share with you...but that was probably almost a year ago.  And I have no idea what I did with those pics.  So I'll share the pics from the site that I originally found the recipe, Circle B Kitchen.  As usual, mine wouldn't have turned out as beautifully as these anyway.  It sure is a good thing that I can cook because I am definitely not a photographer.  Anyways- my recipe is a little different but the method is same.  And really, this is one of those things that you don't even need a recipe for.  There is no need to measure any of it out.  Just eye ball it, mix it all up, top some sliced tomatoes & bake.  Easy peasy!  It makes for a great side dish but I love then on top of my Spaghetti with Garlic.  Yummmm.  Seriously one of my all time favorite meals! 

Ingredients:
**  See Note Below
1 1/2 lbs Ripe Slicing Tomatoes
1 cup Plain Panko Bread Crumbs
1/4 cup Parmesan Cheese, grated
2 tsp Dried Italian Seasoning
1 tsp Granulated Garlic
Salt & Pepper, to taste
Olive Oil, to drizzle

Directions:
Preheat the oven to 400 degrees. Slice the tomatoes about 1/4 of an inch thick & lay flat on a sheet pan. (I use a foil lined sheet pan for easy clean up!)
Mix together the Panko, Parmesan, Italian Seasoning, Granulated Garlic, Salt & Pepper.  Evenly top the sliced tomatoes with the bread crumb topping mixture.
Drizzle the topped tomatoes with a little olive oil & bake at 400 degrees for 10 minutes or until the breadcrumbs are nice & golden brown.
* Note: Honestly, I do not measure here. I use about a teaspoon of Panko Bread Crumbs per tomato slice, then add half as much Parmesan Cheese as I did of the Panko.  (If I have 6 slices of tomatoes then I'd use 6 heaping teaspoons of Panko & 3 heaping teaspoons of Parmesan.)  Then I add in the dried Italian season, garlic powder, salt & pepper to taste.  You can adjust the amounts according the size of tomatoes that you use. 
 
I usually serve these on top of my Spaghetti with Garlic
Enjoy!!

Chicken Tamale Pie

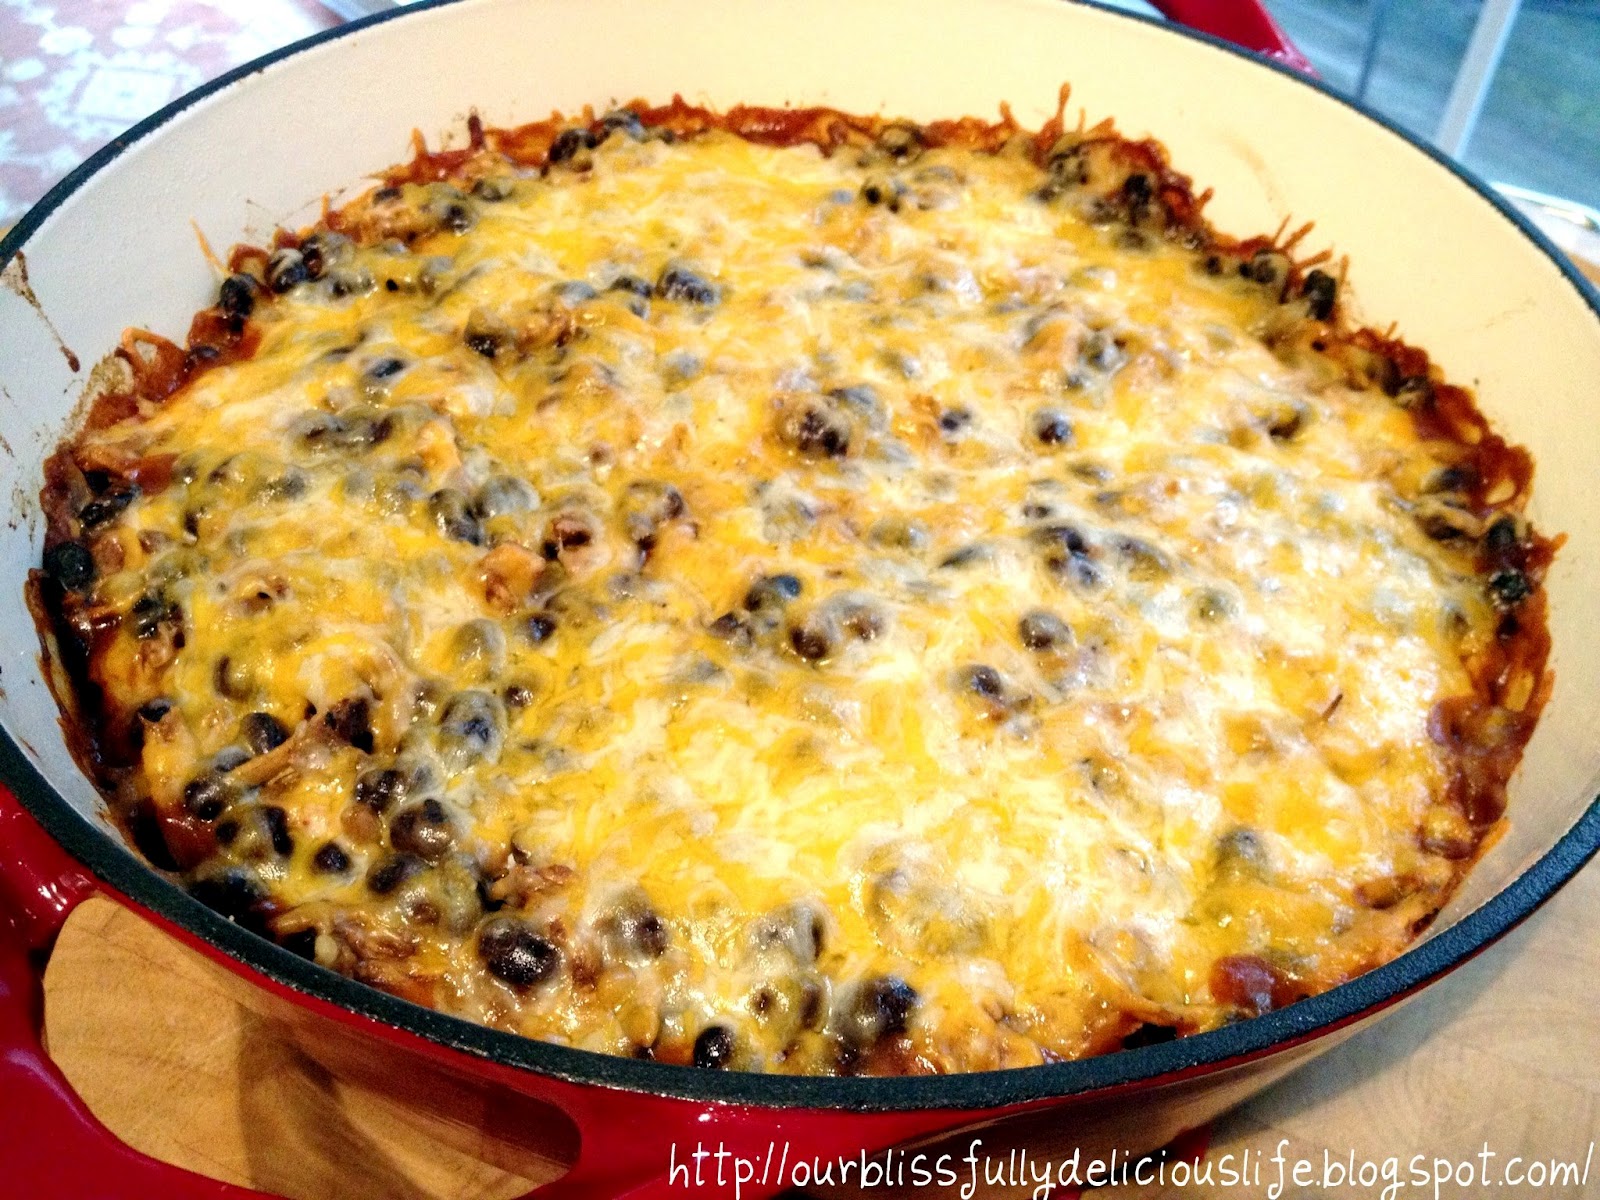
I've had this recipe on my "To Try" list for a while now.  Doesn't it look delicious?!?  It's basically a deconstructed (and much easier to make) tamale.  It doesn't taste exactly like a traditional tamale because, well, it's not one.  But it's got all the flavors there.  I finally made it last week & we all LOVED it.  It was so good, I'm sure it will become a regular in our house.  It's got a yummy corn bread bottom topped with enchilada sauce, chicken & cheese.  Yum!  I think the original recipe came from Cooking Light, but this is the one that I had saved to try.  It's from Pinch of Yum.  I love her photos so I had to share one but I'm also including my finished product too.  I am clearly a less talented photographer/ food stylist, but rest assured it tasted fantastic!!  I'm listing the recipe the way that I made it, which is slightly different than the original so make sure you check it out too.  I used chicken & black beans.  I also used a round braising pan to bake it in.  Pinch of Yum did hers in a pie plate.  But you can use any casserole type dish that you'd like & substitute ingredients per taste!
Ingredients:
1, 8.5oz box Corn Muffin Mix (I used Jiffy brand)
1 egg
1/3 cup Milk
1, 14 3/4oz can Creamed Corn
1, 4oz can chopped Green Chilies, drained
1, 10oz can Red Enchilada Sauce
1, packet of Taco Seasoning, separated 
1-2 cups cooked Chicken Breast, shredded
1, 15oz can Black Beans, drained
1 cup Cheese, shredded (I used a pre-shredded Mexican blend)
Optional toppings:
Avocado, sliced
Sour Cream
Lettuce, shredded
Tomatoes, chopped
Black Olives, sliced
Directions:
1.  Preheat the oven to 400 degrees.  Spray a casserole dish with nonstick cooking spray.  (I used a 4 quart braiser.) 
2.  In a medium sized bowl, combine the corn muffin mix, egg, milk, green chilies, creamed corn, & 2 heaping teaspoons of taco seasoning. 
3.  Pour the corn muffin mixture in the prepared dish & bake at 400 degrees for 20-25 minutes, until just barely set & golden brown. 
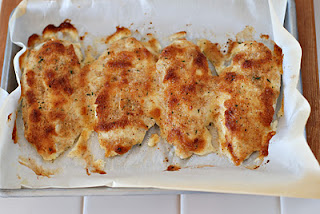
4. While the corn muffin mixture is baking prepare your chicken/ bean mixture.  There are several options here.  You can bake a chicken breast, shred it & mix it with the taco seasoning & black beans.  You could use a store bought rotisserie chicken, shred it, then mix it with the taco seasoning & black beans.  You could use left over chicken.  Or you can do what I did, ahead of time.  I put a large, boneless, skinless chicken breast in the crock pot with a half of a thinly sliced onion, 1/4 cup of chicken broth (or water) & the rest of the taco seasoning.  I cooked it on high for 3-4 hrs, until it easily shredded easily with a fork.  Then I mixed in the black beans. 
5.  After the corn bread mixture has baked, pierce it generously, all over with a fork.  (Don't worry if it sticks a little, no one will see this layer!)  Pour the entire can of enchilada sauce evenly over the top.  Go as spicy as you like here.  I used mild.
6.  Add the chicken & black bean mixture on top of the sauce drenched corn bread & sprinkle the shredded cheese on top.  Bake at 400 degrees for 15 minutes, or until the cheese is melted.  Let sit for at least 5 minutes to set before serving.  I liked mine with sliced avocado.  But the little one love hers with sour cream.  The hubs, of course, drenched his in his favorite Cholula sauce.
This serves 8, or 6 if you have really big eaters.  Enjoy! 

Parmesan Crusted Chicken

This is a Hellmann's Mayonnaise original recipe that I stumbled upon on The Enchanted Cook's website.  It has become a weekly staple in our household over the past few months.  It's quick & very easy to make.  Even more importantly, everyone loves it!  It only has 4 ingredients & I bet just about everyone always has them all on hand now.  While I seem to be able to make it about once a week, I have not taken pictures.  So I'm using these lovely ones from The Enchanted Cook.  Besides, she did an amazing job photographing the dish, I see no reason for me redo them!  You should check out her blog as well.  There are lots of yummy ideas over there! 
Ingredients:
4 Boneless, Skinless Chicken Breasts
1/2 cup Mayonnaise (Light or Regular)
1/4 cup Parmesan Cheese, shredded
4 tsp Italian Seasoned Dry Breadcrumbs
Salt & Pepper, to taste
Directions:
Preheat the oven to 425 degrees.  In a small bowl, combine the mayonnaise & the Parmesan cheese.
Place the chicken breasts in a baking dish.  Spread the Parmesan/ mayo mixture evenly on top of the chicken breasts. 
Lightly season with salt & pepper, then sprinkle the seasoned breadcrumbs over top.  Bake at 425 degrees for 20 minutes, or until the chicken is thoroughly cooked. 
Perfectly crisp, moist chicken every time! 
Yummm!!  Enjoy! 

Bubble Up Pizza

First, let me point out that these are not my pictures.  I found on them on PasstheSushi.com.  Their recipe is slightly different than mine, but it's basically the same.  You should check out their site, there are lots of other delicious recipes to look at too! 
This Bubble Up Pizza is such an easy, fun recipe!  I had to share it, even if I didn't take the pictures myself!  It appears to be an old recipe but I had never heard of it before.  There are several versions floating around but they all the same basic ingredients.  We tried it last week & everyone loved it.  We make pizza just about every Friday night but occasionally I want to change it up.  This is the perfect compromise.  My daughter still gets her pizza fix, but we also get some variety.  It is super easy to make.  I let my little one add the cheese & toppings, just like she would if we were making a pizza.  You can even give the kids kitchen shears & let them cut up the dough!  Add in your favorite pizza toppings & make it to your preference.  You really can't go wrong with this one.  I was concerned about the dough aspect, I thought biscuits with pizza ingredients would be odd.  But it wasn't, at all!  In fact, if I hadn't made it myself, I wouldn't have guess it was made out of biscuit dough!  It tastes just like a thick crust pizza & it is yummy!  I made my own pizza sauce, but you could easily use a jarred pizza or pasta sauce too.  Give this bubble up pizza a try, you will not be disappointed! 
Ingredients:
3- 7.5oz cans of Refrigerated Biscuits (or 2- 12oz cans)
1- 15oz can of Tomato Sauce
1 tsp Dried Oregano
1 tsp Granulated Garlic
2 1/2 cups Mozzarella, shredded
Pizza Toppings (optional):  pepperoni, ham, sausage, mushrooms, olives, onions, etc.
Directions:
1.  Preheat oven according to the biscuit packaging's instructions.  (The kind I used was to 400 degrees.)  Grease a casserole dish or oven save skillet.  (I used a 9X13 glass casserole dish coated with nonstick spray.) 
2.  In a bowl, combine the tomato sauce with the Dried Oregano & Granulated Garlic.  (I didn't really measure the seasonings, I just add them to taste.)
3.  Cut the biscuits in half or quarter.  (I halved them because I used the smaller biscuits.  If you use larger ones, you'll want to quarter them.) 
4.  Combine the cut up biscuit dough with 3/4 of the pizza sauce, 1/2 of the cheese, & 1/2 of your toppings.  (We used ham, black olives & onion.)  Toss to coat well & pour evenly into the casserole dish or skillet. 
5.  Top with remaining sauce, cheese & toppings, just like a regular pizza. 
6.  Bake in a preheated oven for 20-30 minutes, or until the biscuits are fully cooked.  (This will take longer to cook than the directions on the biscuits.) 
7.  Let cool slightly before serving & enjoy!! 
This recipe makes 6-8 servings. 

Slow Cooker Fiesta Chicken


This is a fun, family pleasing recipe!  There are several different versions of it floating around but this is mine. If you like my Chicken Enchilada Dip, then you are going love this!  It is so easy to make, there's no prep work involved.  Throw everything in the crock pot & let it go...Perfect for busy weeknight dinners!
Ingredients:
2 Large or 3 Small Boneless & Skinless Chicken Breasts
1, 10 oz can Red Enchilada Sauce
4 oz (1/2 block) Cream Cheese
8 oz (1/2 jar) Salsa
1, 15.25 oz can Black Beans, drained
1 1/2 cup Frozen Corn
Directions:
Spray the inside of a crock pot with nonstick spray.  (I'm not sure that this is necessary but I do it.)  Pour 1/2 of the can of Enchilada sauce in the bottom.  Place the chicken breasts inside (I even put them in frozen!)
Then pour the rest of the sauce over the chicken.  This is the enchilada sauce that I usually use.  If you like spicy, get the medium or hot! 
Place the cover on & turn the crock pot on. 
The following will depend on the type of crock pot that you use.  One of mine is medium sized & just has ON & OFF.  No low, high, etc.  With that one I cook the chicken in the enchilada sauce for about 4 hours.  With my other, larger, crock pot; I would cook it on low for about 8 hours or high for 4.  Once the chicken is fully cooked, you can easily shred with a fork.  I stick a fork or a silicone spatula in the crock pot & just break it apart.  Then add in the cream cheese, salsa, black beans, & corn.  Stir to combine. Cover & continue to cook 45 minutes or so.
I serve it over my Mexican Rice.  
We love to top it off with my Tomato & Avocado Salad!! 
This makes 4-6 servings, depending on how you choose to serve it.